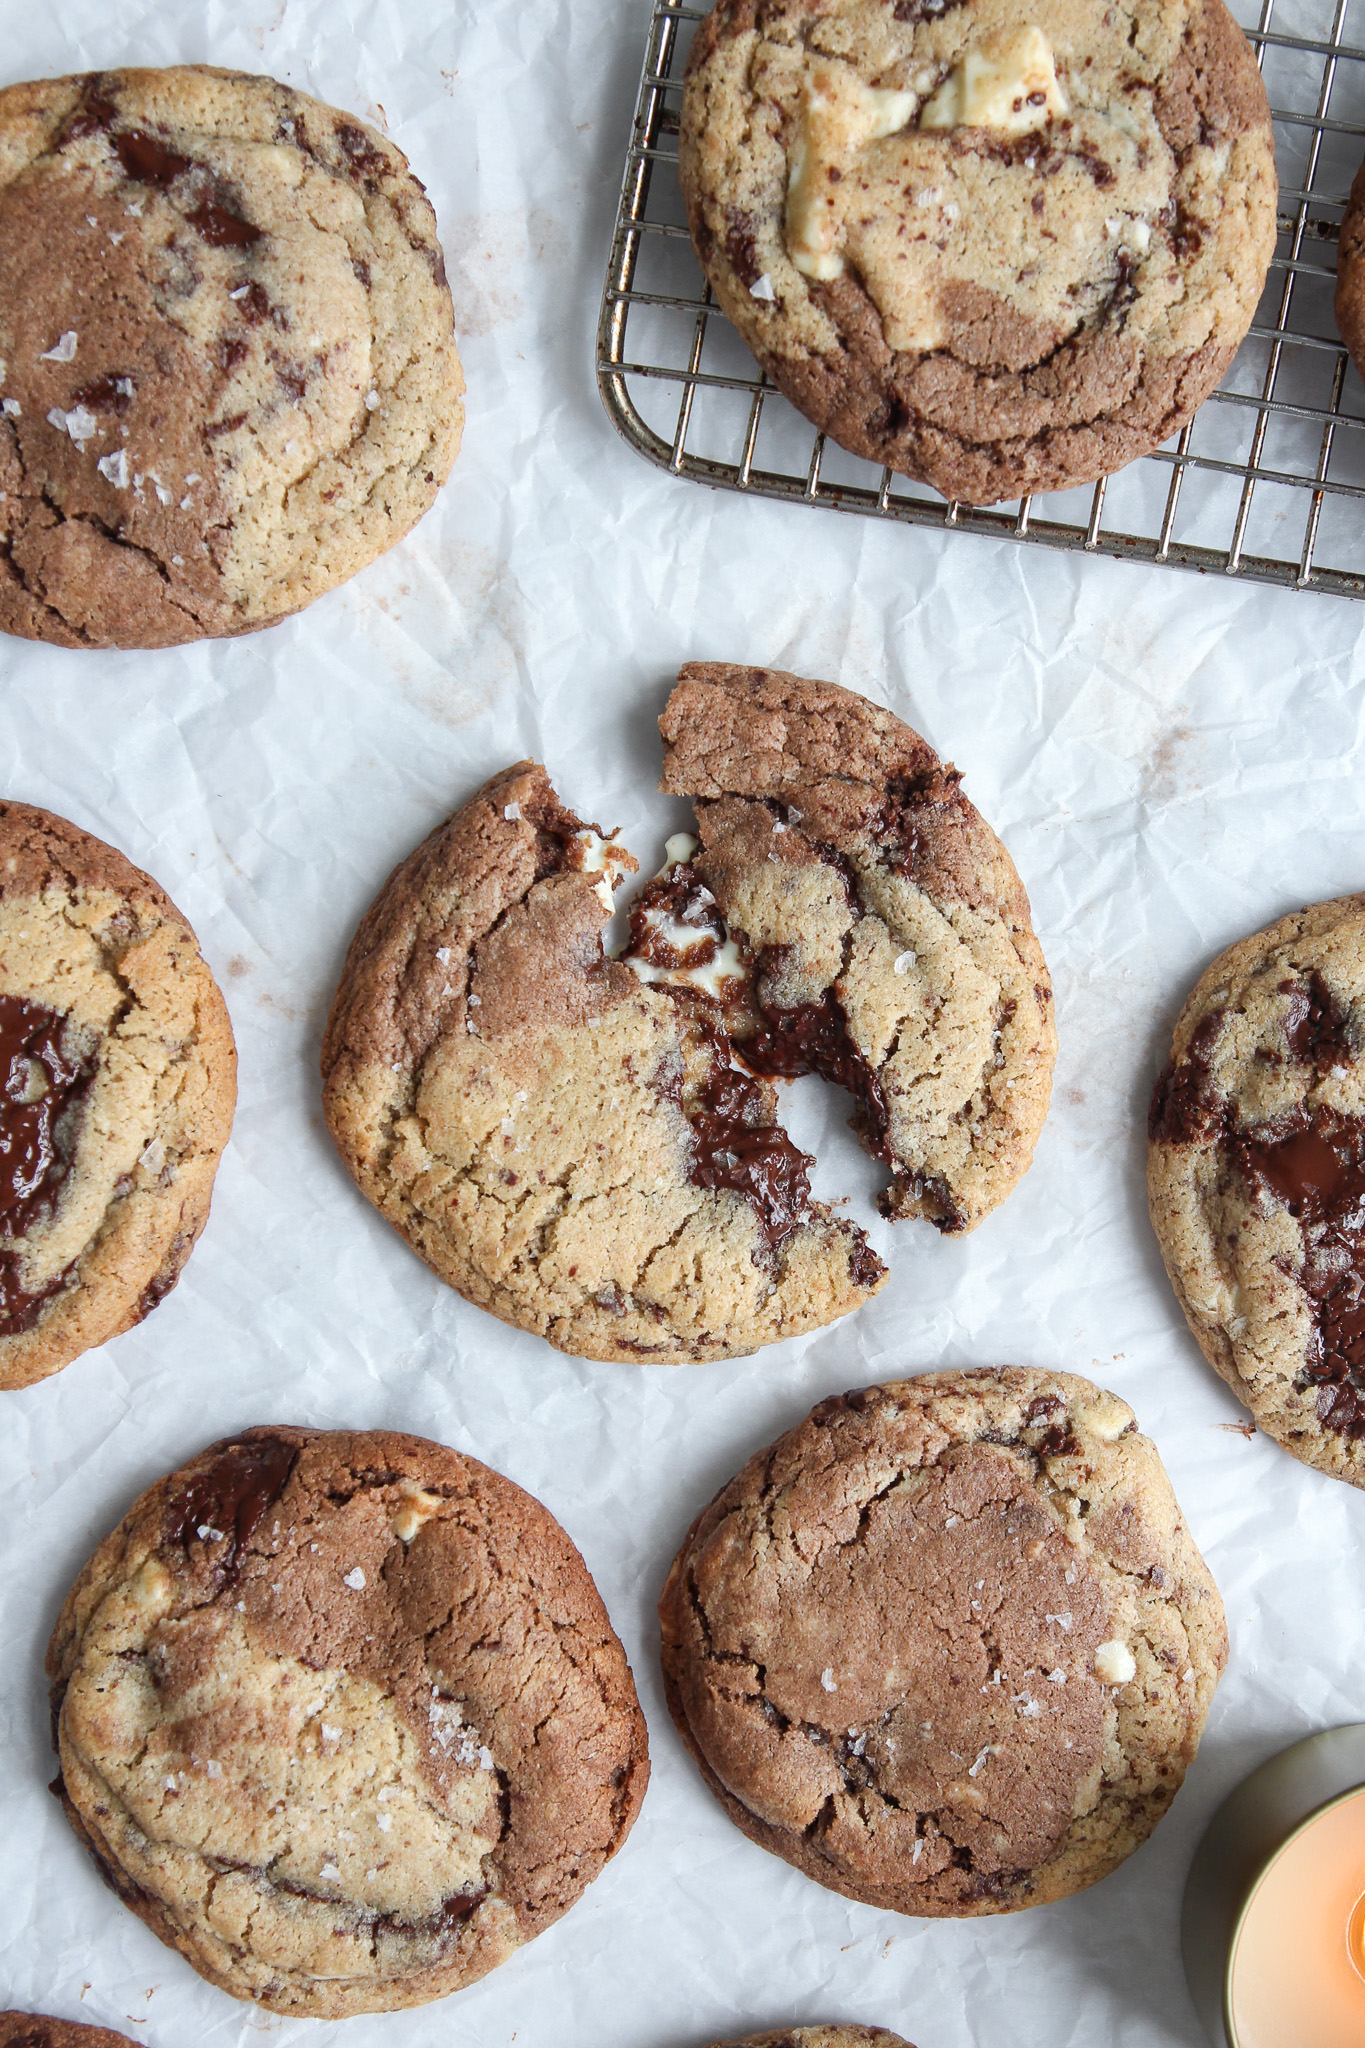
Marbled Miso Chocolate Chunk Cookies

To me, a perfect chocolate chip cookie needs a gooey centre, a crisp edge, and chocolate chunks over chips (sorry!). When I was 11, I was provided lunch at school. The cook at the school made these delicious chocolate chunk cookies on occasion that checked all three of my aforementioned boxes and used both white and dark chocolate chunks (my two favourite types of chocolate). 14 years later, those cookies still live in my head rent-free and were the inspiration behind these Marbled Miso Chocolate Chunk Cookies. These cookies have all the best features of their inspiration with a few upgrades to take them to the next level—miso paste and buckwheat flour, I’m looking at you!
Table of Contents
- Marbled Miso Chocolate Chunk Cookies Ingredients
- Why Does This Recipe Use Grams Instead of Cups?
- Step 1—Make the Cookie Dough Base
- Step 2—Prepare the Chocolate Dough
- Step 3—Fold in the Chocolate
- Step 4—Scoop and Roll the Marbled Dough
- Step 5—Chill the Dough
- Step 6—Bake and Cool
- More Delicious Cookie Recipes

Marbled Miso Chocolate Chunk Cookies Ingredients
To make this recipe you will need the following ingredients:
- 125 grams salted butter
- 105 grams light brown sugar
- 70 grams white sugar
- 2 teaspoons white miso paste
- 1 large egg
- 1 teaspoon pure vanilla extract
- 210 grams light buckwheat flour
- 62 grams tapioca starch
- 1 teaspoon baking powder
- 1/2 teaspoon baking soda
- 1 tablespoon cacao powder
- 1/2 teaspoon water
- 85 grams white chocolate
- 85 grams dark chocolate (70% cacao or higher)
Why Does This Recipe Use Grams Instead of Cups?
If cooking is an art, then baking is a science. What I mean by this is baking is a lot more sensitive to inconsistencies and changes. When it comes to baking, I like to use a kitchen scale to weigh my ingredients because the results are so much more accurate. By weighing ingredients, I can be sure I am using the same quantity every single time, leading to more accuracy and replicable results. I started using weights in baking when I became a bread baker, and now if a baking recipe has weight measurements for ingredients, I will always use these over the cup measurements.
Recognizing that not everyone owns a kitchen scale, I included the approximate cup measurements in the recipe as well.


Step 1—Make the Cookie Dough Base
Preheat the oven to 375°F and line a large baking sheet with parchment paper.
In the bowl of a stand mixer affixed with the paddle attachment, cream together the butter, sugars, and miso paste until smooth. Beat in the egg, followed by the vanilla. Alternatively, you can do this by hand with a large mixing bowl and a baking spatula if you do not have a stand mixer.
In a large mixing bowl, whisk together the buckwheat flour, tapioca starch, baking powder, and baking soda. I like using buckwheat flour in this recipe because it adds a subtle nutty undertone, which pairs gorgeously with the chocolate.
Pour the dry ingredients into the bowl of the stand mixer and beat on medium speed until just combined. Start slowly, then gradually increase the mixer speed so as not to launch flour all over your kitchen.


Step 2—Prepare the Chocolate Dough
Split the dough roughly in half, leaving half the dough in the stand mixer and moving half into the bowl the dry ingredients were in. The half left behind in the mixer is going to become the chocolate dough used for the marbling effect in the cookies.
Add one tablespoon of cacao powder and 1/2 teaspoon of water to the dough in the mixer’s bowl. Mix on medium speed until the cacao powder is fully combined.


Step 3—Fold in the Chocolate
Roughly chop the white and dark chocolate into chunks. Split the chocolate chunks between the base dough and chocolate dough, folding it into each with a baking spatula.

Step 4—Scoop and Roll the Marbled Dough
Use a small cookie scoop—about 1½ tablespoons—to divide the two doughs into an equal number of balls. This recipe will make 16 to 18 cookies.
Take a ball of each type of dough and gently press them together. Roll them between your palms to create a compact little ball of chocolate and base dough, as shown above. Repeat with the remaining cookies.

Step 5—Chill the Dough
Transfer the balls of dough to a lined baking sheet and pop them in the freezer to chill for 10 minutes before baking. Chilling the cookie dough before baking helps to slow the spread of the cookies as they bake, which leaves you with a thicker and better-textured cookie. This step is key to attaining that gooey centre-crisp edge combo.


Step 6—Bake and Cool
Bake the cookies eight at a time on the prepared half sheet pan. You want to make sure to leave about two inches between each cookie so they have space to spread as they bake.
Bake for 8 to 10 minutes. The cookies will look a little raw in the middle still, but trust me, they are ready to come out; the middles will set and firm up a bit as the cookies cool. Sprinkle the tops of the cookies with a bit of flaky salt because chocolate + salt = heaven.
Let the cookies rest on the baking sheet for 5 minutes before transferring them to a cooling rack.
Repeat with the remaining cookie dough.

More Delicious Cookie Recipes
If you loved my Marbled Miso Chocolate Chunk Cookies, be sure to try these other delicious cookie recipes:
White Chocolate and Pistachio Cookies with Cranberries
Cozy Oatmeal + Cranberry Cookies
If you make these cookies, please tag me on Pinterest or Instagram so I can see! I love to see what you all are making.
Feel free to leave any questions, comments, or reviews below. I love to hear from you!


Marbled Miso Chocolate Chunk Cookies
Equipment
- Half-Size Baking Sheet (18 inches x 13 inches)
- Parchment paper
- Stand mixer with paddle attachment (alternatively, use a mixing bowl and baking spatula.)
- Small cookie scoop (1½ tablespoons)
Ingredients
- 125 grams salted butter (1/2 cup)
- 105 grams light brown sugar (1/2 cup)
- 70 grams white sugar (1/3 cup)
- 2 teaspoons white miso
- 1 large egg
- 1 teaspoon pure vanilla extract
- 210 grams light buckwheat flour (1¼ cups)
- 62 grams tapioca starch (1/2 cup)
- 1 teaspoon baking powder
- 1/2 teaspoon baking soda
- 1 tablespoon cacao powder
- 1/2 teaspoon water
- 85 grams white chocolate
- 85 grams dark chocolate (70% cacao or higher)
- Flaky salt
Instructions
- Preheat the oven to 375℉ and line a large baking sheet with parchment paper.
- In the bowl of a stand mixer affixed with the paddle attachment, cream together the butter, sugars, and miso paste until smooth. Beat in the egg, followed by the vanilla.
- In a large mixing bowl, whisk together the buckwheat flour, tapioca starch, baking powder, and baking soda.
- Pour the dry ingredients into the bowl of the stand mixer and beat on medium speed until just combined. Start slowly, then gradually increase the mixer speed so as not to launch flour all over your kitchen.
- Split the dough roughly in half, leaving half the dough in the stand mixer and moving half into the bowl the dry ingredients were in.
- Add the cacao powder and 1/2 teaspoon of water to the dough in the stand mixer bowl. Beat on medium speed until combined.
- Roughly chop the white and dark chocolate, then divide it between the regular and chocolate doughs. Using a baking spatula, fold in the chocolate until evenly distributed.
- Use a small cookie scoop to scoop a ball of the regular and chocolate doughs. Gently squish the two balls of dough together and roll into a smooth ball between your palms. Transfer to a lined baking sheet. Repeat with the rest of the dough. The dough will yield 16-18 cookies.
- Chill the dough for 10 minutes in the freezer.
- Bake the cookies 2 inches apart for 8 to 10 minutes. 6 to 8 cookies per tray is the sweet spot for spacing. The cookies will look slightly raw in the middle when you remove them from the oven, but they will set as they cool. Sprinkle the tops of the cookies with a bit of flaky salt.
- Allow the cookies to cool for 5 minutes on the pan before transferring them to a cooling rack.
